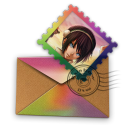
Sunday, January 31, 2010

This tutorial was written by me on
January 31th 2010. Using PSP X2 but any version will work and for those
with working knowledge of PSP.
I do not take credit for this creation as it's being make with part of elements already together, just want to share it with you.
Materials needed:
Tube of choice, I'm using a Suzanne Woolcott. Purchase license and tubes HERE.
The Cluster is a FTU at Raspberry Designs called Memoirs-Keepsakes-Cluster.
Mask: dmsk0532 By Diana Todd
I have the word art ready for you if you want to use it HERE.
This a quick tut, don't forget to add a drop shadow as you go.
Ready, Ok.
Open a new canvas 600 x 600 you may crop later.
Flood fill with white.
Open the RR_EK_Memoirs&Keepsakes_Cluster, re size by 18%
Add tube/s of your choice.
Place now the word art I supplied. With selection tool select the first part, copy and paste where you like it, then do the same with the 2nd part.
Open mask in your psp and minimize.
Add a raster layer above the white back ground and flood fill with color #a88d66
Apply mask: go to Layers- New mask layer - from image. Find mask dmsk0532
I re size mask with Pick Tool.
You can crop your image now.
Add copyright and your text.
On layer palette hide the white background, merge visible all layers left. Save as PNG.
...and you are done.
Please feel free to contact me if you have any question.
Friday, January 29, 2010

This tutorial was written by me on
January 29th 2010. Using PSP X2 but any version will work and for those
with working knowledge of PSP. Any similarity to any other tutorial is
purely coincidental.
Materials needed:
Materials needed:
Tube of choice, I'm using a Elias Chatzoudis. Must have a valid license to use his art.
Purchase tubes and license at MPT.
The kit is a FTU by ET Designs called "Colors of Love" Thank you.
Mask by Monti: Monti's Circle Mask HERE
I have the WA "Color of Love" ready for you HERE.
Font: Send Flowers.
Please leave a comment if you try my tutorial. Thank you.
Let's start:
Open a new canvas 600 x 600 Flood fill with white.
Tip, I used the shadowed elements for this tutorial.
Open Freebie 6 (scallop frame) resize by 25%. Copy/paste to your canvas.
Add noe tube of your choice.
Open paper: Freebie 8 resize by 20% Copy?paste below the tube.
With Eraser Tool erase the parts we don't need on the tube and paper layers.
Open Freebie 1 resize by 12% copy and paste. Duplicate twice. See my sample tag.
Resize Freebie 5 by 15% and move it to the left side.
Resize Freebie 2 by 18% paste to your canvas.
Open Freebie 7 copy and paste, resize by 20%
Open Freebie 3 resize by 12% copy and paste as a new layer.
If you are happy with your tag you can now hide on layer palette the white background and merge visible all layers left.
Unhide white background.
Add a new raster layer above the white BG and flood fill with color #e277a6
Apply Monti's Circle mask. I resize mine a little with pick tool.
Paste WA I supplied above the mask.
Add your text and copyright.
Hide white BG again and save as PNG.
Thank you for trying my tutorial. Feel free to contact me if you have any question.
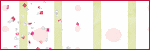
Thursday, January 28, 2010

This tutorial was written by me on
January 28th 2010. Using PSP X2 but any version will work and for those
with working knowledge of PSP. Any similarity to any other tutorial is
purely coincidental.
Supplies needed:
Tube of your choice, I'm using a Suzanne Woolott. Purchase license and tubes HERE
The Scrap kit is a PTU from BeDeSign and heavenDreams called "2 Hearts". Thank you.
Font: Ahoy Ice Floe.
Please leave some
love if you try my tutorials. Thank you.
Ready?
Open a new canvas 600 x 600. Flood fill with white.
*Add a drop shadow as you go.
From the kit open element_65, re-size by 65% copy and paste to your canvas as a new layer.
Re-size element_30 by 70% copy -n- paste to the right side above the element 65.
Rotate 12 right. Duplicate - Mirror.
Copy -n- paste element2 place it in the botton certer of your canvas.
Now, re-resize element_46 by 35% rotate 35 left. Copy -n- paste to the right side.
Duplicate - Mirror.
Open element_45 re-size by 50% -n- rotate 35 left. Move it to the right side.
Duplicate - Mirror.
Open element_09 Copy -n- paste. Re-size by 23, rotate 18 left. Move it to the right side.
Dupliate - Mirror
Copy -n- paste element_12 re-size by 50% Move it to the left. Duplicate - Mirror.
Copy -n- paste element_82 re-size by 50% Duplicate - Mirror.
Copy -n- paste element_41 re-size by 35%
Copy -n- paste element_08 re-size by 25% Rotate by 30. Duplicate - Mirror - Flip.
Open element_17 copy -n- paste as a new layer.
Add your favorite tube. Place it to the center.
Open element_22 copy -n- paste above the white background.
Re-size by 75% Low opacity to 60.
Add copyright -n- your text.
On layer pallette hide the white background layer. Save as PNG.
Thank you for trying my toturial. Please feel free to contact me if you have any question.

This tutorial was written by me on
January 28th 2010. Using PSP X2 but any version will work and for those
with working knowledge of PSP.
I do not take credit for this creation as it's being make with part of quick pages.
Supplies needed:
A tube of choice, I'm using a Jennifer Janesko, purchase tubes at CILM.
The kit a FTU form Ivy's Inspiration called "Love in Blue" Visit her BLOG for download.
Mask: Heart Burst from Artwork by EssexGirl HERE
Ready?
Add a drop shadow of your choice to all elements and tube.
Open a new canvas 600 x 600 flood fill with white.
From the kit open ii_loveinblue_extras3 copy -n- paste to your canvas as a new layer.
Re-size by 35% Mirror.
Open ii_loveinlove_extra1 copy -n- paste. Re-size by 25%
Add tube of your choice.
Open ii_loveinblue_extra2, with selection tool select the blue hearts copy and paste below extra3
Duplicate - Flip.
Crop if you want. Add a new raster layer above the white backgroud, flood fill wiht a blue gradient and apply mask.
Add copyright and you are done.
Thank you for trying my tutorial. Please contact me if you have any question.
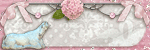
Tuesday, January 26, 2010

Supplies Needed for this tutorial:
Tube of your choice, I'm using a Jennifer Janesko, purchase a lisence and tubes at CILM
The lovely kit is a PTU from BeDeSign and heavenDreams called "2 Hearts". Thank you.
Mask WSL_Mask214 from Weescotslass Creations.
Please don't forget to leave some
love if you try my tutorials. Thank you.
Ok. Ready?
Don't forget to add a Drop Shadow as you go.
Open a new canvas 650 x 550. You may re-size later.
Flood fill with white. Add a new Raster layer. Selections ~ Select all.
Open Mask, minimize.
Open a paper from the kit, copy and paste into selections to your canvas. Deselect.
Apply mask: go to
Layers ~ New Mask Layer ~ from Image.
Select mask 214 from the source window.
Layers ~ Merge ~ Merge Group.
Open Element_65 Copy and paste to your canvas.
Rotate by 90. Re-size by 60% Paste tube below the frame, add paper from the kit and paste below the tube.
Make a rectangle selection with selection tool to the frame. Selections ~ Invert. Hit delete in your key board to the tube and layer paper.
In your layer palette right click on the frame layer. View ~ Current only.
Make visible tube and paper layer. Merge visible all this 3 layers.
Again right click on layer palette. View ~ All.
Rotate merged layer 8 right.
Open Element_83 re-size by 60% paste below the frame to the right side. Duplicate ~ Mirror.
Open Element_82 re-size by 40% paste to the right size below the frame. Duplicate ~ Mirror.
Open Element_64 Re-size by 70% Rotate by 12 left, paste above frame.
With Eraser tool erase the right side of the element 65 where the frame is.
Paste element_40 re-sized by 25% to the bottom side of the frame.
Re-size Element_31 by 50% paste to the right side. Duplicate ~ Mirror.
Open Element_48 re-size by 45% paste to the top of the canvas. See my sample tag.
Open Element _26 Re-size by 50% paste to your canvas, move it to the left side.
Duplicate ~ Mirror.
Duplicate ~ Mirror.
Re-size Element_06 by 90% copy and paste to the right side.
Duplicate ~ Mirror.
Open Element_10 Re-size by 30% Duplicate~ Mirror.
Add your name and the word "Be Mine" using Alpha included in the beautifil kit.
I re-sized alpha by 23 % and rotate some of the letters by 12% left and/or right.
Add copyright and you are done!
Thank you for trying my tutorial. Please feel free to contact me if you have any question.
Add your name and the word "Be Mine" using Alpha included in the beautifil kit.
I re-sized alpha by 23 % and rotate some of the letters by 12% left and/or right.
Add copyright and you are done!
Thank you for trying my tutorial. Please feel free to contact me if you have any question.
I received this awesome award from Lisbeth Joa at

Award for creativity and dedication.
Thank you so much Lisbeth, this mean a lot to me.
I'm passing this award to the following great designers:
Doris Lynch at Scraps Dimension
Seachell at Seachell Scraps
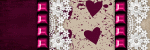
Friday, January 22, 2010

This tutorial was written by me on
January 22th 2010. Using PSP X2 but any version will work and for those
with working knowledge of PSP. Any similarity to any other tutorial is
purely coincidental.
Supplies Needed for this tutorial:
Tube of your choice, I'm using a Suzanne Woolcott. Purchase a license and tubes HERE.
The beautiful scrap kit is a PTU from Lady Ann visit her blog HERE.
Purchase the kit at Scraps With Attitude. Thank you.
Please don't forget to leave some
love if you try my tutorials. Thank you.
Font: 2Peas Dreams.
Pluggin: Eye Candy 400 - Gradient Glow (optional)
Let's start:
Open a new canvas 600 x 600 Flood fill with white.
*The kit is full size you may need to sharpen after re-size, add Drop Shadow as you go.
From the kit open element 10 re-size by 22% Duplicate. To duplicated layer: Adjust ~ Blur ~ Gaussian Blur Radius 20.
Open element 013 re-size by 30% paste below the Heart (elem 10) Move it to the right side of the heart. Duplicate ~ Mirror.
Re-size Ele025 by 10 % paste to your canvas above the copy of the pink heart and move it to the top.
Re-size Ele020 by 15% rotate 22 right. Duplicate ~ Mirror.
Re-size Ele005 by 14% move it to the center of the heart. Duplicate ~ Mirror.
Open Ele023 re-size by 10%
Re-size Ele012 by 30%
Add now your favorite tube(s), copyright and your text, I used Gradient Glow.
X out the white background layer and save as PNG.
Thank you for trying my tutorial. Please feel free to contact me if you have any question.
Thursday, January 21, 2010

This tutorial was written by me on
January 20th 2010. Using PSP X2 but any version will work and for those
with working knowledge of PSP. Any similarity to any other tutorial is
purely coincidental.
Supplies needed:
A tube of your choice, I'm using the artwork of Suzanne Woolcott, purchase a license and tubes HERE.
The scrap kit is a FTU from Melancolie at Le Digiscraps de Melancolie
"Add on Love Greedy"
Font: Hyrule
Font: Hyrule
Please don't forget to leave some love when you download any FTU. I also ask for a little word if you try my tutorial, it motivates me. Thank you.
Let's start:
Open a new canvas 650 x 360 flood fill with white.
From the kit Open and re-size the following elements:
As always my tag is a sample of what I did with the kit. See my sample and place the following parts)
Element 24 by 22% Flip ~ Rotate by 32 left.
Below the ele24 (Ribbon Frame) paste a re-size paper and fit your favorite tube. Get rid of the parts we don't need with the Eraser Tool.
Element 9 by 18% paste to your canvas as layer and below the paper. Duplicate ~ Mirror.
Element 11 by 15% Rotate 32 right. Duplicate ~ Mirror.
Element 20 by 22% Rotate 34 right. Drag this layer below the elem 9 (branches)
Element 17 by 15% Rotate by 38 right. Duplicate ~ Flip ~ Mirror.
Element 31 by 10% Rotate 17 left.
Element 16 by 10% Mirror.
Element 6 by 5%
Element 10 by 20%
Now, add copyright and your text, I add noise to my name.
X out the white background and save as PNG.
Thank you for trying my tutorial, feel free to contact me if you have any question.
Friday, January 15, 2010

This tutorial was written by me on January 15th 2010. Using PSP X2 but any version will work and for those with working knowledge of PSP. Any similarity to any other tutorial is purely coincidental.
For this tutorial I'm using the beautiful artwork of Elias Chatzoudis. You must have a license to use his art, You may purchase at MPT.
The awesome scrap kit is a PTU from Wicked Princess Scraps called Angelic Katie. Thank you.
Font TKDoodle.
Let's start:
Open a new canva 650 X 650 flood fill with white.
* Add a Drop Shadow as you go.
Open Doile element copy & paste as a new layer to your canvas.
Open Mist element copy & paste to the left side of your canvas.
Open Dust element copy & paste to to the left side of your canvas, duplicate & mirror.
Copy & paste LaceFrame to the center of your canvas.
Resize Callalilly element by 50% rotate by 13 left, duplicate, mirror.
Resize Notepaper by 40% rotate 26 right.
Add your tube resize to fit the frame.
Resize CamilliaFlower by 36% Duplicate, Mirror.
Open PillowBow resize by 35 and rotate 26 left.
Resize CandleTrio by 50%
Open Fragapiniflower by 35% Duplicate, Mirror.
Add now copyright and your text.
X out the white background layer. Merge visible all layers left.
Save as PNG. You are done!
Thank you for trying my tutorial. Please leave any comments you may have.

This tutorial was written by me on January 15th, 2010.Using PSP X2 but any version will work and for those who have working knowledge of psp. Any similarity to any other tutorial is purely coincidental.
Tube of choice, I'm using a Elias Chatzoudis, must have a valid license to use his art.
Purchase at MPT.
The beautiful scrap kit is PTU from Wicked Princess Scraps called "Love Cutie" Thank you.
Mask from Vixpsp: Vix_mask400
Font: Ambiance BT.
Let's start:
Open a new canvas 600 x 600 flood fill with white. Add a new rater layer.
Selections ~ select all.
Open mask in your psp, minimize.
Open paper 10 copy & paste into selection to your canvas. Deselect.
Apply mask by going to Layers ~ New mask layer ~ From Image.
Select Vix_mask 400 from the source window.
Then Layers ~ Merge ~ Merge Visible.
**Add a drop shadow as you go, some elements need to be sharpen after resizing.
Open WP_LC_MAT copy & paste to your canvas, Resize by 95%
Selections ~ Select All ~ Float ~ Defloat.
Selections ~ Modify ~ Contract by 20 px.
Selections ~ Modify ~ Smooth (make sure you have both in 10's antialias and preserve corners checked)
Hit delete several times in your keyboard to delete the selected area. Deselect now.
Open paper 17 resize by 80% copy & paste below the mate (our frame now, lol)
With Magic Wand Tool click inside the frame.
Selections ~ Invert. Hit delete in your keyboard to the paper layer.
I add a close up of the same tube inside the frame, low opacity to 40.
Resize the following elements and add them to your tag. See my sample tag.
Glitterframe by 85%
Lips 20 %
Tigerlily 70 %
Rosecorsage by 60 %
SmallFlower 85 %
Largebow 50%
Heartlattice 60%
Candybar 45 % rotate 60% left
Candykisses 60%
Add your tube, copyright and your text.
X out the white background and save as PNG.
Thank you for trying myy tutorial. Please feel free to contact me if you have any question.
Leave any comment you may have.
Wednesday, January 13, 2010

This tutorial was written by me on January 13th, 2010.Using PSP X2 but any version will work and for those who have working knowledge of psp. Any similarity to any other tutorial is purely coincidental.
Supplies needed:
A tube close up of your choice, I'm using a Jennifer Janesko, you must have a valid license to use her art. Purchase at CILM.
The Kit is a FTU from Jaelop Designs called Our Love, visit her blog for download. Please leave some love.
Mask is WSL_Mask353 from Weescotslass Creations
Font is PTU: Love Light Rob.
Lets start:
Open a new canvas 650 x 600 floodfill with white. Add a new raster layer. Selections ~ Select all.
Open mask 353, minimize.
Open paper 7 resize by 25 copy and paste into selection to your canvas. Deselect.
Apply mask : Layers ~ New Mask Layer ~ From Image find mask 353 in source window.
Layers ~ Merge ~ Merge Group.
*Add a drop shadow as you go to elements mentioned below.
Resize Wordart 1 by 32. Paste above the mask.
Resize Element 21 by 28 % Copy & paste to your canvas as a new layer above the word art.
Open your tube resize to fit the frame.
Open paper 6 resize by 20 copy & paste below the tube.
With Magic Wand tool click inside the frame to select.
Selections ~ Modify ~ Expand 3.
Selection ~ Invert. In your keyboard hit delete to the paper 6 and your tube.
Here is how much I resize elements I used to decorate my sample tag.
Element 31 by 40% rotated by 80 left. Deplicate: Image ~ Mirror.
Element 19 by 28%
Element 43 by 20%
Element 33 by 18% Rotate by 12% left, Duplicate ~ Mirror.
Element 25 by 20% Duplicate ~ Mirror.
Element 17 by 18%
You can add more elemtent if you'd like from the beautiful kit.
When you are happy with your tag, add copyright and text of your choice.
X out white background and save as PNG.
Thank you for trying my tutorial. Comments are welcome.
Monday, January 11, 2010

This tutorial was written by me on January 11th, 2010.
using PSP X2 but any version will work and for those who have working knowledge of psp. Any similarity to any other tutorial is purely coincidental.
Supplies Needed:
Tube of your choice, Im using a Susanne Wolcott, must purchase a license to use her artwork HERE
The Flower is a FTU from Design by Tina called Please leave some love when download.
Mask is from Chas ScrapnBitz: Mask9. Please leave some love.
Frame by me download HERE
A ribbon and umbrella of your choice.
Font is a PTU 2Peas Gingersnap
Let's start, this a easy tut.
Open a new canvas 600 x 600 and floodfill with white. You can crop later.
Open frame and copy & paste to your canvas as a new layer.
Copy & paste your tube below the frame.
With Selection Tool make a rectangle selection selecting inside the frame.
Selection ~ Invert. On your tube layer hit delete in you keyboard. Deselect.
Hide white BG layer, merge visible the frame and tube. Duplicate.
Rotate 6 one of them right the other left.
Unhide white BG.
Open Freebie_Cluster resize by 17% copy & paste above the frame.
Adjust ~ Sharpeness ~ Sharpen. Add a Drop shadow.
With Freehand selection tool select one of the butterfly ~ copy.Deselect and paste as a new layer duplicate as many times you want and move it
where you prefer.Crop your canvas if you need to.
Above the white BG add a new rater layer.
Selections ~ Select all.
Floodfill this layer with color #d4f094 Deselect.
Open Chas mask9 and apply to this layer.
Layers ~ Merge Group.
Add ribbon and umbrella and you are done.
Add copyright, your text.
X out white background layer, merge visible all layers left.
Save as PNG.
Sunday, January 10, 2010

using PSP X2 but any version will work and for those who have working knowledge of psp. Any similarity to any other tutorial is purely coincidental.
Supplies Needed:
Tube of your choice, I'm using a Ismael Rack, must have a valid license to use his art, purchased at Artistic Minds, Inc
The gorgeous scrap kit is a FTU from Designs by Vaybs, called Betsy Paradaise Dream.
Visit her blog for download, please leave some love when downloading.
Mask WSL_mask336 from Weescotslass Creations. Thank you.
Font: SBC Calligrapher 2000
Pluggin: Eye Candy 400 - Gradient Glow (optional for text)
Open a new canvas 600 x 600 (you may crop later) floodfill with white.
Open Frame (5) resize by 80 copy & paste to your canvas a new layer.
Open paper of your choice, one that match your tube, with selection tool make a rectangle selection of 500 x 500 copy and paste below the frame 5.
With Magic Wand tool select inside the frame. Selections ~ Modify ~ Expand by 3.
Selections ~ Invert and hit delete in your keyboard. Deselect.
Paste your tube below the frame and above the paper with Eraser tool delete all parts outside the frame.
Add elements of your choice, here is how much I resize those I used. See my sample:
Decor (21) 50%, duplicate ~ Mirror
Decor (17) 50 % duplicate ~ Mirror
Decor (28) 60% Rotate 32 right
Flowers by 40%
Decor 15 & 16 by 30%
Candles by 44%
Butterfly by 35% Rotated 32 right.
Once you are happy with your tag, hide white backgound.
Merge visible all other layers left.
Now, you can crop your image.
Add a new raster layer above the white BG
Selections ~ Select all
Open mask in you psp. Minimize mask.
Open paper 2, copy & paste into selection to your canvas. Deselect.
Apply mask 336 by going to Layers ~ New mask Layer ~ From image, find mask in Source Window.
Then Layers ~ Merge ~ Merge Group.
Add copyright, and your text. I used Gradient Glow to mine.
Merge visible all layer but keep white BG hided for transparent BG.
Save as PNG and you are done.
Thank you for tying my tutorial. Comments of any kind are welcome.
Here is another sample:

Friday, January 8, 2010

using PSP X2 but any version will work and for those who have working knowledge of psp. Any similarity to any other tutorial is purely coincidental.
Supplies needed:
4 close up tubes, I'm using Suzanne Woolcott artwork. Must have a valid lisence to use it.
Purchase HERE
The cluster frame is a freebie from Kimla Designs, called "With Love"
Ribbon of your choice.
Font: ReservoirGrunge
Let's start:
Open a new canvas 650 X 350 Floodfill with white.
Open Kimla_4U_Overlay(2) resize by 20% copy and paste as a new layer to your canvas.
Resize paper by 25% With selection tool on rectangle, make a selection of 200 X 200 copy & paste to your canva. Paste a tube of your choice above the paper and below the Overlay. Select with Magic Wand tool inside the round frame.
Selections ~ Invert. Hit delete in your keyboard to get rid of the paper and tube out side the round frame.
Resize Tem1 element by 5% copy & paste to your canvas.
Go back to the paper, make a rectangle selection of 350 X 250 copy & paste to your canvas.
Paste 3 close up tubes below the frame and above the paper. Resize to fit each frame.
With Magic Wand tool select inside each frame.
Selections ~ Modify ~ Expand by 4.
Selections ~ Invert. Hit delete on your keyboard to each of the tube layers and paper.
Merge visible only the paper, the 3 tubes close up and frame.
Now, rotate frame by 12 right. Drag this layer below the overlay.
Add ribbon of your choice.
Resize Word Art by 20 % copy and paste to your canvas.
Add your name, add any effect you'd like and drag this layer to below the word art.
I low the opacity to 60 to my name.
Move the Word Art above the name.
Add copyright. Hide the background layer. Merge Visible.
Save as PNG. You are done!
Thank you for trying my tutorial, please feel free to contact me if you have any question.
Thursday, January 7, 2010

using PSP X2 but any version will work and for those who have working knowledge of psp. Any similarity to any other tutorial is purely coincidental.
Supplies needed for this tutorial:
Tube of your choice, I'm using a Jennifer Janesko, must use with a valid license, can be purchased at CILM.
The wonderful kit is a FTU from Doris at Scraps Dimension. Thank you. Visit her blog to download, please leave some love when you grab it.
Mask: Valentine2 from Vix HERE
Font: P22Ruthie
Open a new canvas 600 x 600 floodfill with white. Add a new canvas, Selections ~ Select all.
Add a drop shadow of your choice as you go.
From the kit open paper of your choice, copy & paste into selection. Deselect.
Apply MaskValentine2. Layers ~ Merge Group.
Copy and paste as a new layer Glitter Frame2 in to your canvas, resize by 70%
*Adjust ~ Sharpeness ~ Sharpen.
Copy and paste as a new layer Glitter Frame, resize by 70%
Add same sharpen *
Resize Heart of Roses by 65% and paste in to your canvas as a new layer.
Open Frame3, copy & paste as a new layer, resize by 47%
Paste paper3 below Frame. Resize.
Paste tube of your choice below the frame and above paper2, resize to fit frame.
With selection tool, select inside frame.
Selections ~ Invert. In your keyboard hit delete to get rid of part of rhw paper and tube we don'r need.
Add elements of your choice, see my sample tag and use as a guide.
Here is how much % I resized elements in my sample tag:
Flower 3: 30%
Flower 4 20%
Bow7: 20%
Valentine Frame: 20%
Pillow 25%
Wine Glass: 28%
ValentineChampagneGiftBox: 25%
When you are happy with it add copyright and your name.
X out the white backgroud layer. Merge visigle all layers left.
Save as a PNG. You're done!
Thank you for trying my tutorial. Please feel free to email me if you have any question.
Leave any comments you may have.

using PSP X2 but any version will work and for those who have working knowledge of psp. Any similarity to any other tutorial is purely coincidental.
Supplies Needed for this tutorial:
I'm using the lovely work art of Caron Vison, must have a valid license.
To purchase tubes and licene go CILM
The precius kit is a PTU called Sweet Serenity by Wicked Princess Scraps. Thank you!
Mask WSL297 from Weescotslass Creations
Font: Fabulous 50's
Open a new canvas 600 x600 and floodfill with white, you can crop later. Add a new raster layer.
Selections ~ Select All.
Open paper of your choice, I used paper 15, copy and paste into selection, Deselect.
Apply WSLmask297. Layers ~ Merge ~ Merge Group.
When paste elements add a drop shadow of your choice.
Open from the kit Window element resize by 70%
Copy and paste paper 8 below the window, resize by 35 %
Paste now the tube of your choice betwen the paper and window.
Open Courtain element resize by 20% paste above the tube and below the window.
See my sample tag. Duplicate courtain element : Image ~ Mirror.
Resize Cloud element by 36% Drag this layer below paper 8.
Duplicate the Cloud: Image ~ Mirror. Drap this layer to the top and resize by 76%
Move it to the left side of the window.
Decorate your tag with elements of your choice. I resize those I used as follow:
DoodleFlower 50%
PianoKey 65%
StarComet 50%
Pillow 37% Rotate 55 left
Fan 45%
Fragapini 30%
Candle 30%
Candle2 - 22%
Add more elements if you want to.
Add now copyrigth, your name.
Xout the white background layer, merge all visible and save as PNG.
Thank you for trying my tutorial. Feel free to contact me if you have any question.
Subscribe to:
Posts (Atom)
About Me

- Chatita
- Hello, I'm Chatita, I live in Central North Carolina. I've been PSPing for about 6 years and I love it the more I learn the more I get addicted. I hope you enjoy my tutorials. I appreciate your visit, please contact me if you have any suggestion or question.
Contact me


TWI


